How to Write Effective Orton-Gillingham Progress Reports

Whether you are working in private practice as an Orton-Gillingham tutor or working with students in a classroom or school setting, sharing information about a student’s progress is an important part of our work. Orton-Gillingham progress reports are one way to do that. When it comes to learning to read, a child’s progress is as individual as the Orton-Gillingham lesson plans themselves. While you can’t click on an icon and get an instant progress report, some tips can make this task a bit less overwhelming.
Tips for Sharing Orton-Gillingham Progress Reports with Parents
Set a schedule that is manageable for you. Monthly, every other month, or quarterly are potentially good schedules depending on your caseload and progress report format. Pre and post-testing results should be reported separately. For more on finding starting points and monitoring progress, Finding A Starting Point Using The Orton-Gillingham Approach may help. Some tutors may choose to only complete a formal progress report annually when conducting some testing to demonstrate growth.
Caution: It is better to consistently provide less frequent reports promptly than to promise more than you can comfortably manage.
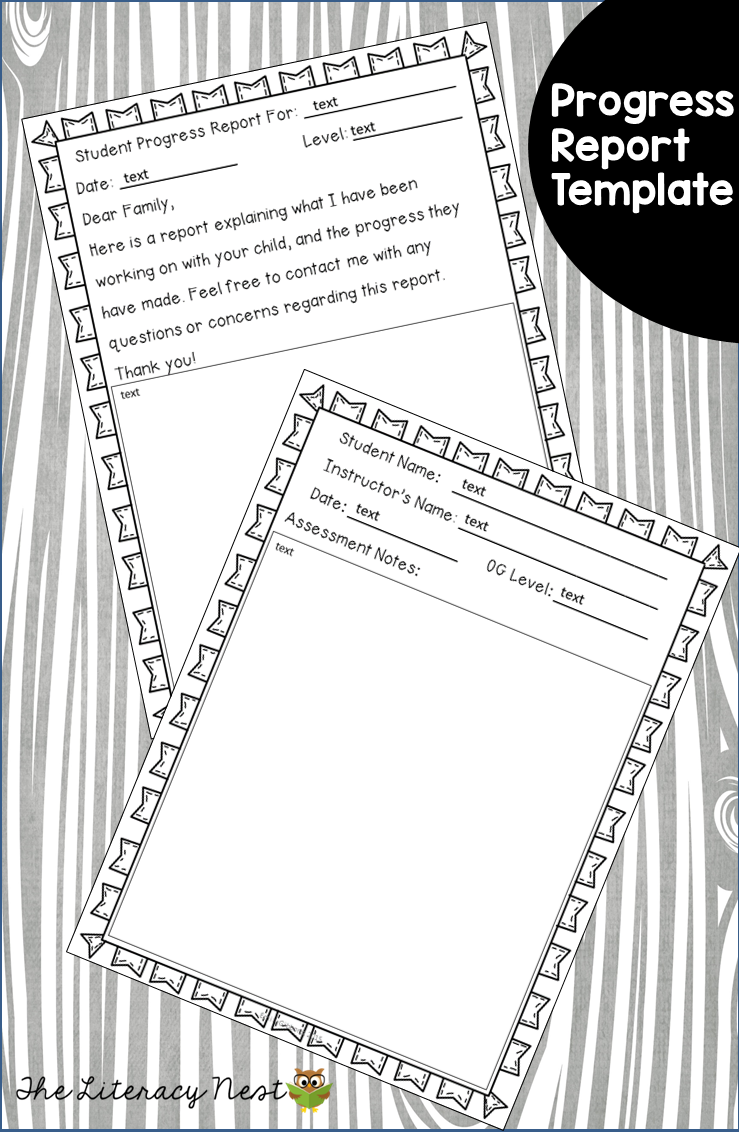
For narrative reports, it is helpful to have a format or a template like the one shown below that you use to streamline the report writing. A three-part approach in which you:
- List student strengths.
- Explain what the student has been working on in that level of OG, what they demonstrate mastery in, and how this learning relates to the goal of this OG level.
- Describe the goal for the next steps or continued practice. I find for students who are reading novels or working with a particular focus on additional skills such as handwriting, intensive phonemic awareness work, or visual tracking, it is helpful to include a sentence or two about your recent focus or how the student is responding to the book.
Learn how I create student intake forms! Watch my video on The Literacy Nest YouTube channel!
Grab Your Free Orton-Gillingham Progress Reports Template Here
More Tips for Writing Orton-Gillingham Progress Reports
Need help with your Orton-Gillingham progress reports? Check out Tutor Success Academy’s Tutor Toolkit!
1. Make sure to write the reports with parents in mind.
It is possible to spend a great deal of time writing beautifully detailed and accurate reports that are incredibly helpful to a fellow professional, but overwhelming and confusing for a layperson or parent. This is one of those things I learned the hard way. I find that one way to make the concepts a bit more concrete is to give examples of the types of words that the student can read and write given the new concepts that they have mastered. Example: With her latest skills, Jane Doe can read and write words like pigtail, mailbox, pathway, railway, and dismay.
2. Consider using a checklist format.
Choose a format with a few brief comments to make reporting on groups or large numbers of students more manageable. A checklist allows parents to see relatively quickly the amount of material covered and what will be coming up shortly. In addition to formal reports, there are some great ways to share information less formally both using technology and more traditional methods. The less frequently a teacher provides formal reporting, the more important these frequent check-ins become.
3. Present it face-to-face.
There is nothing quite like a face-to-face conversation about what you are working on, what was tricky, and how the child performed during the lesson. Especially for younger children, this ongoing parental contact is hugely valuable. It is important to note that you want to also provide something that parents can share with teachers or refer back to.
4. Try exit slips
An exit slip not only makes a great communication tool but also a way of assessing a student’s understanding of new learning. At the end of the lesson, you ask the student to talk about their new learning while you record their answer on a form to share with their family. Repeating the concept in a clear and concise manner requires synthesizing their learning in a very powerful way.
5. Use the tools you already have
Many tutors use software to manage their clients and schedules that include an option to share lesson notes with the parent. This is another way to provide frequent short 1-2 sentence updates about the student’s learning. For groups of tutors working together, this is a nice way to keep communication open and ongoing.
6. Share a video or pictures from the lesson
A picture is worth a thousand words and seeing a lesson for themselves is a very powerful way to share with parents the work that you are doing with their child. Inviting them to sit in on a lesson from time to time or sharing a videotape is sometimes easier than putting the child’s skill growth into words.
7. Try online portfolio sharing
For the technologically inclined, there are some wonderful options online for portfolio sharing including the app, Seesaw. Students can share photos, work samples, videos, etc. This online portfolio can not only show up to the minute examples of the student’s work, but it can provide a very orderly and concrete way to show growth over time.

However, you choose to go about it, parent communication is an important cornerstone of our practice. What is successful for one teacher may not be right for the next and you may need to use different strategies with different families. However, when we work together, it helps our students reach their fullest potential.

Are you looking for a list of words to use in your Orton-Gillingham lessons? Word List Builder has got you covered!
Save time searching for words! Create customized and meaningful review, build your folder of words, create templates and games, and much more in Word List Builder. Sign up today and get a 14-day FREE trial!


