Blending Practice
Hi Literacy Nest, friends! Do you ever find some of the simplest materials make the best games? How many ways can you think of to use a pack of index cards? How about those sticker dots people use at yard sales? Today I’m going to share how I made an activity for practicing blends that literally took me minutes to create. Sometimes, you JUST don’t have the time to bust out the laminator and and the paper cutter. Am I right? Or you ran out of laminating film and the copy machine is broken. If this happened to you (and I know it has), then this is the post for you.
Grab the following materials:
- A pack of multicolored craft sticks or tongue depressors. I L.O.V.E. these and use them a whole lot. I think my next post is going to be 100 uses for tongue depressors. Just sayin.
- Cardstock or index cards.
- Velcro: Velcro can be a bit pricey and if you’re a teacher, you go through a lot of it. Purchase it online and save!
- Sharp scissors for cutting through Velcro
- Black marker- I tend to use a classic Sharpie, but have been known to grab a Mr. Sketch scented. Sharpie works well when you have to write on the craft sticks or tongue depressors. By the way, I have a secret stash of Mr. Sketch scented markers and DO NOT share them. Who’s with me on this one?
- A quarter
I needed to create a quick blends practice game and had very little prep time. So here it goes.
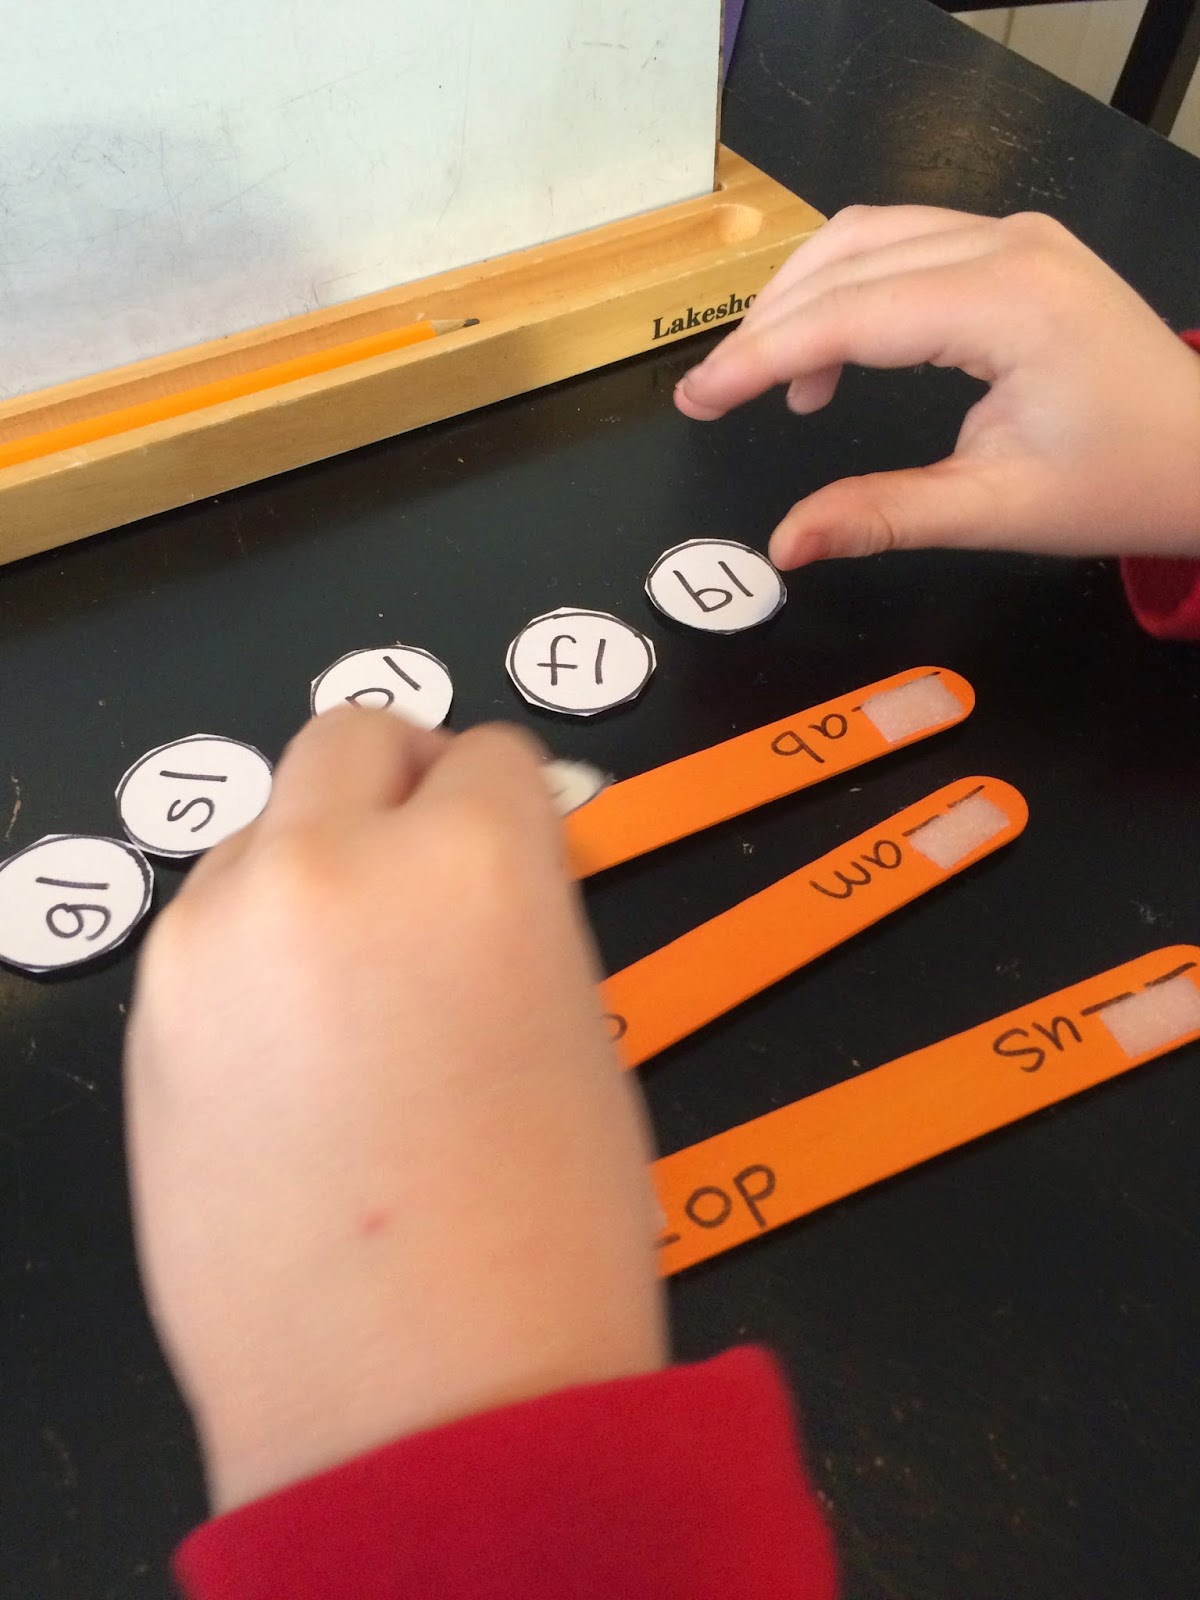
- Trace around the quarter to make a bunch of circles on the cardstock with the Sharpie and cut them out. I was practicing initial L blends so I made at least 6 circles.
- On each circle, with your Sharpie, write a blend.
- On the end of each craft stick, write the word at the, but draw lines in the places where the letters in the blend should be. For example, for the word ‘slip’, write __ __ i p.
- Do this on as many craft sticks as you think you need. I write words on both ends and even on both sides of the craft stick. That way you can just flip it over.
- Velcro. Even though I love the circle Velcro dots, I use the large Velcro on a roll and cut the desired length. I find it fits in the space I want a little better for certain jobs.
- I cut pieces of Velcro about a half inch wide. Affix the SOFT side on the craft stick over the blank spaces you left in the word.
- Put the scratchy side (for lack of a better word) on the back of the circles.
- Store in a Ziploc bag.
How to use them:
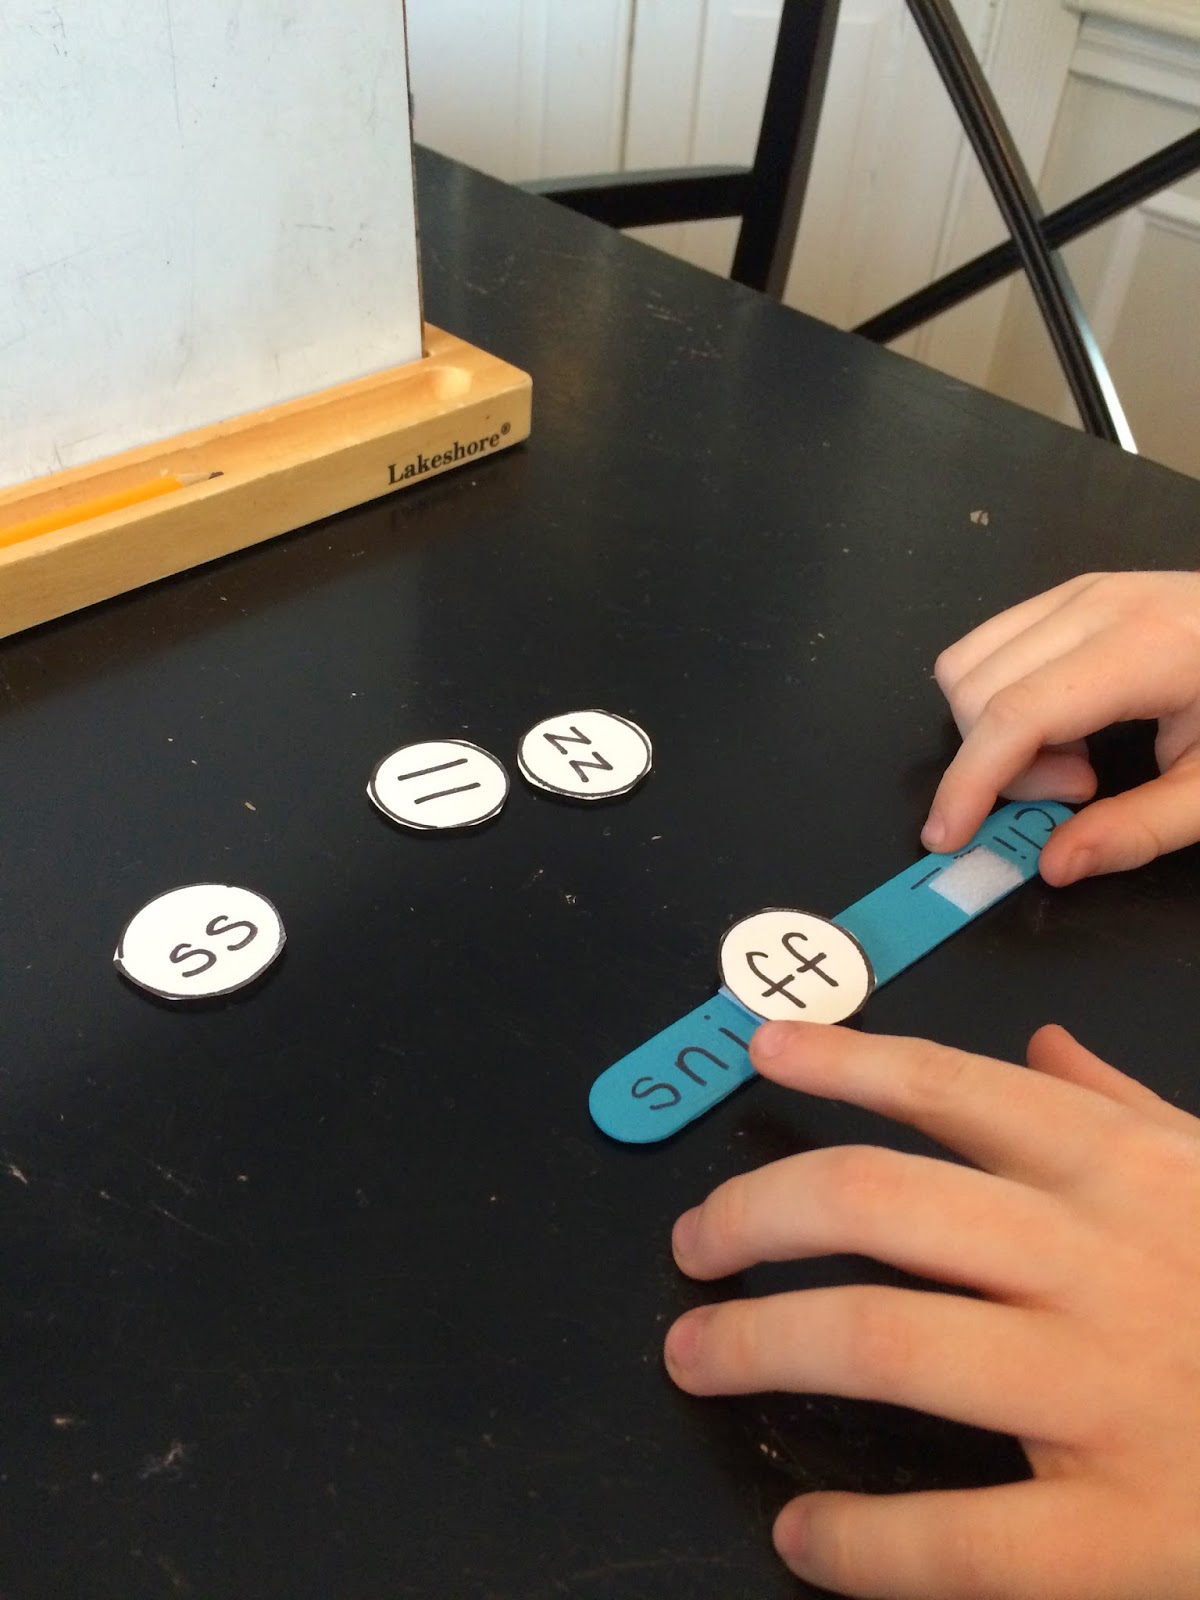
- I lay the craft sticks and circles out on a desk or table.
- The student picks up one craft stick.
- They have to search for the circle that will fit with the blend. There may be multiple choices.
- Stick the circle onto the Velcro with that spells the word correctly.
In the two photos below, one is for the blends practice and the other is for practicing the Floss Rule.
I hope this easy little blends activity has you thinking about using simple office supplies around the house in a new way. What’s your favorite school supply that you couldn’t live without?
Looking for even more tips?
Read: “What Does An Orton-Gillingham Lesson Look Like?


LOVE this!! Thanks for sharing, Emily! 🙂
Literacy Loving Gals
I like this idea!!! It has me thinking…:)
i like this idea, must try
Thank you! 🙂